Installation Guide:
- Download and extract zip file of JIRA app.
- Move the src folder to helpdesk_installation/__apps folder.
- Rename the src folder to jira and make sure all files of src folder are available under helpdesk_installation/__apps/jira
- Now go to Admin Panel of your helpdesk and click on ‘Apps’ in left side menu.
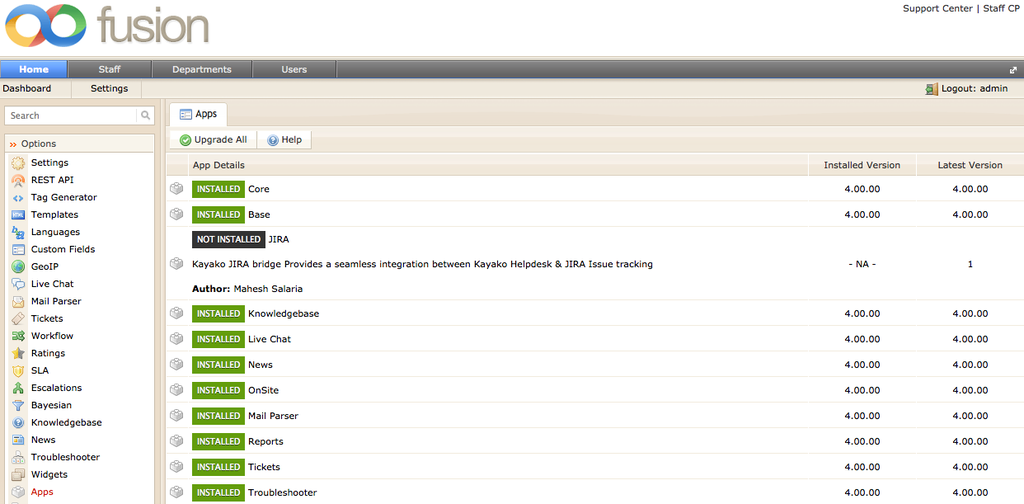
- Now click on JIRA app and you can see the details regarding this app. Click on ‘Install button’ for JIRA app installation.

- Now JIRA is installed in your helpdesk. If you want to uninstall it, then simply click on ‘Uninstall’ button.

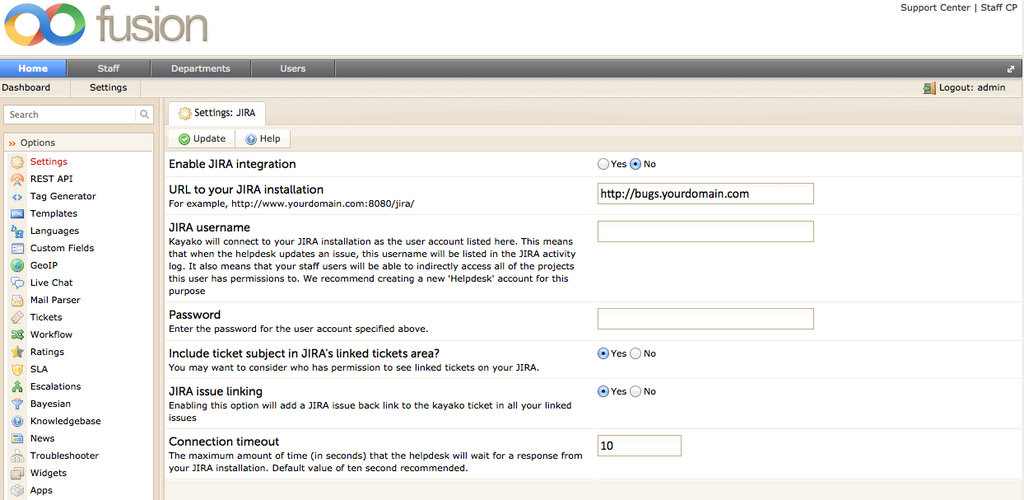
- Click on ‘JIRA’ under ‘settings’ in left side menu. Enter your JIRA settings and click on ‘update’ to save JIRA details.
How it works:
- Go to your staff panel and create a new ticket. Once you have created a ticket, you can see ‘JIRA’ in above menu.
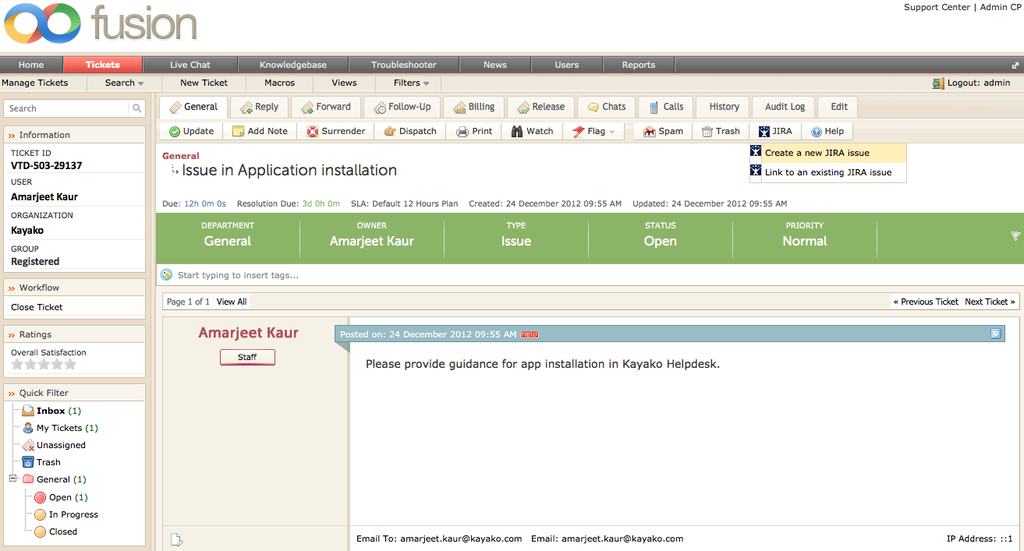
- If you want to create new JIRA issue, simply click on ‘Create a new JIRA issue’.
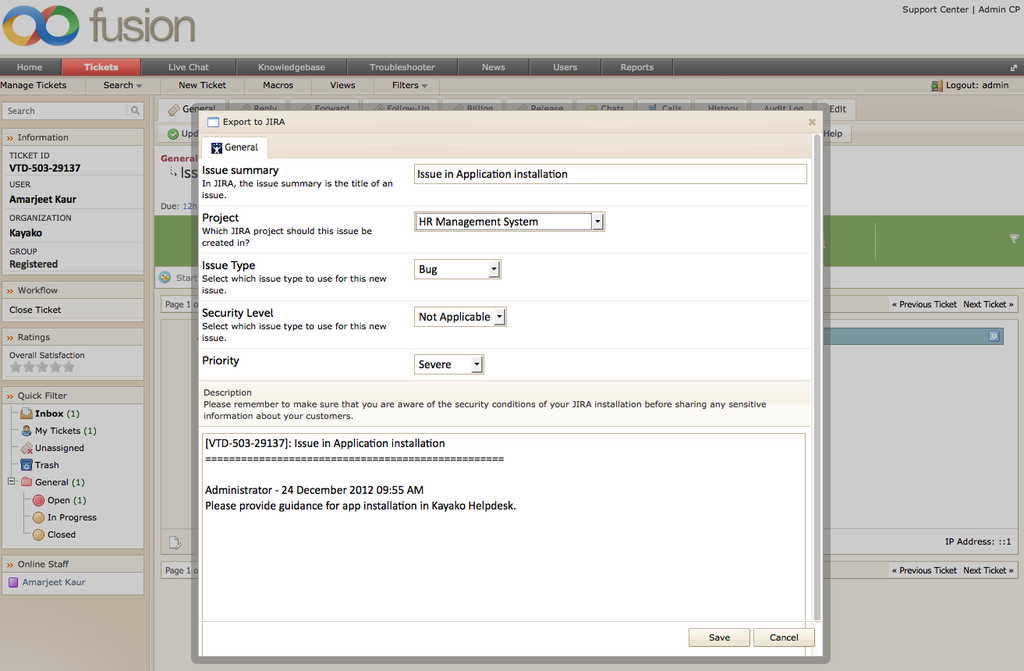
- If you have some ticket, which points to some already existing JIRA issue, then you can simply link that ticket with that JIRA issue by clicking on ‘Link to an existing JIRA issue’.
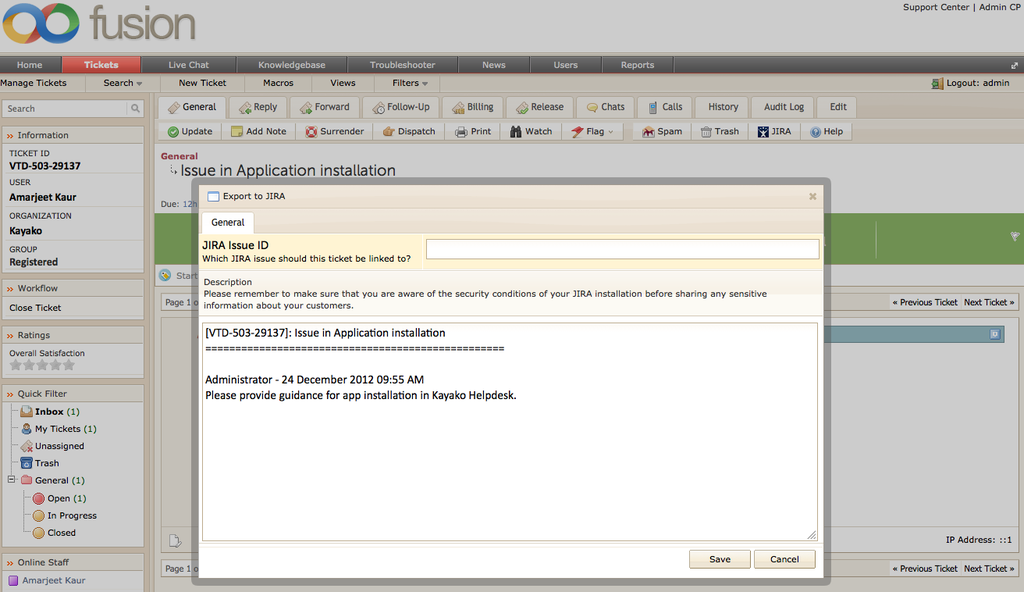
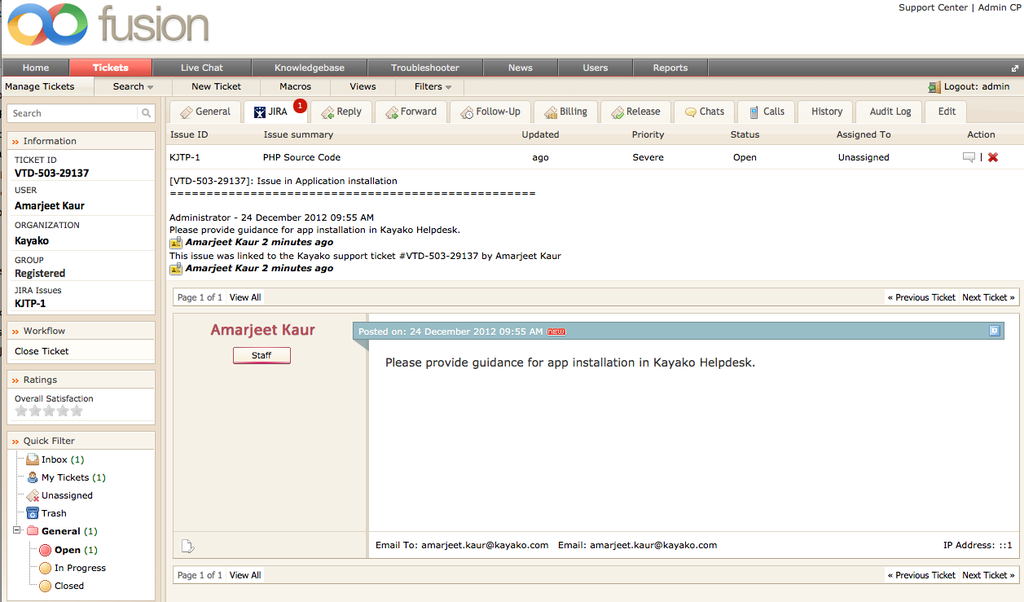
- Once you have linked your ticket with JIRA issue, you can see the posted comments in JIRA within your ticket details, by clicking on ‘JIRA’ tab.
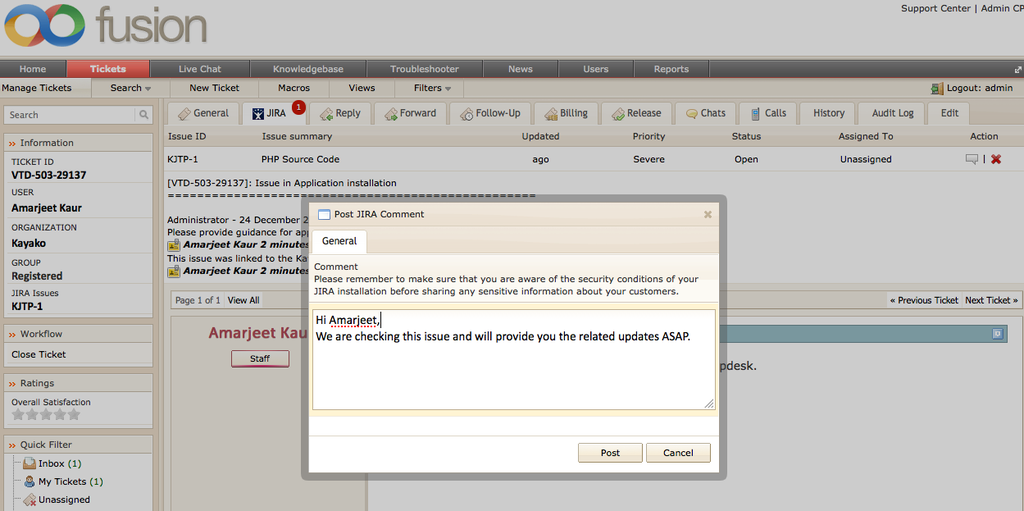
- If you want to post reply to any JIRA comment, then click on ‘message icon’ corresponding to comment, then you will get a pop –up to post your comment.
- You can also unlink your ticket from JIRA issue, by clicking on ‘cross icon’ corresponding to comment.

Loading...